Almost every golf enthusiast would love to have a fantastic home putting greens in their back yard. However, many mistakenly assume this is a preserve of the wealthy. They need to know that all you need to a have is a lawn with enough free space. Building a synthetic practice green can be very cost-effective. In addition, artificial putting greens allows you to put a part of your compound that would otherwise require frequent maintenance, like mowing, to good use.
So, what are some of the reasons that drive many homeowners to consider adding a “build it yourself” putting green to their homes? Let’s find out!
You’ll Have Your Private Golf Course.
Like most passionate people about golf, a home synthetic practice green will give you a somewhat similar golfing experience to what you get in a bigger field. It will also be less the hassle of maintaining natural putting greens.
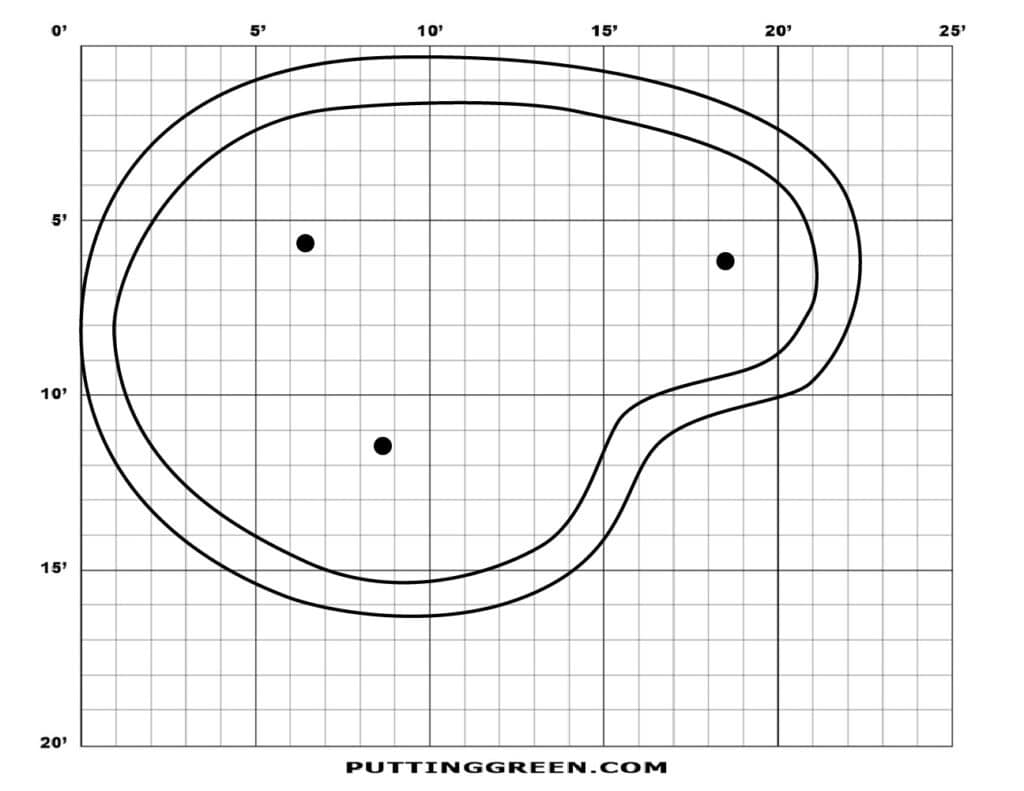
A do it yourself (DIY) putting green kits gives you the creativity and convenience to have a custom putting green design and create any golf course you want. Choose any shape, challenge level, and size of putting. You can have many features or just come up with minimalistic custom golfing environments that help you get improved putting (short game).
You Can Golf Any Time You Want at Your Convenience.
Work on increasing your practice time and improving your short game by adding a putting green to your home. You’ll have a readily available, suitable and convenient place to sharpen your game. Plus, you can show off your newly improved skills when you do play with others in the golf course.
You Do Not Have to Spend a Lot Of Cash And Time.
A home putting greens will help you save time that would be used to arrange for tee times, load up your car, or take long drives back and forth to the course. You will avoid additional costs that go to country club fees, membership fees and more. Did I mention that you will not need to spend on pesticides and watering your synthetic putting greens? This will help you divert your money and time to other urgent needs.
Synthetic Putting Greens Offer You a Lovely Space for Entertaining Your Guests and Family
Your artificial putting greens offers you an excellent source of entertainment for you and your family. Invite your friends and family for get-togethers, and parties and use the artificial putting greens to have fun together. Playing golf will help everyone have a more memorable time and relax. Additionally, if you’ve been practicing, it will be an excellent opportunity to show off your skills.
Synthetic Practice Greens are Easy to Install and Maintain
Installing a professional custom golfing environment is easy if you have the right tools and knowledge. It’s essential to install your home putting greens on a flat, solid, and smooth surface. Unlike natural grass, your artificial putting greens will require very little maintenance, and you won’t have to mow or water them frequently.
Ready to get started? Here’s an overview of the process of how to fix a “build it yourself” synthetic putting green in your home.
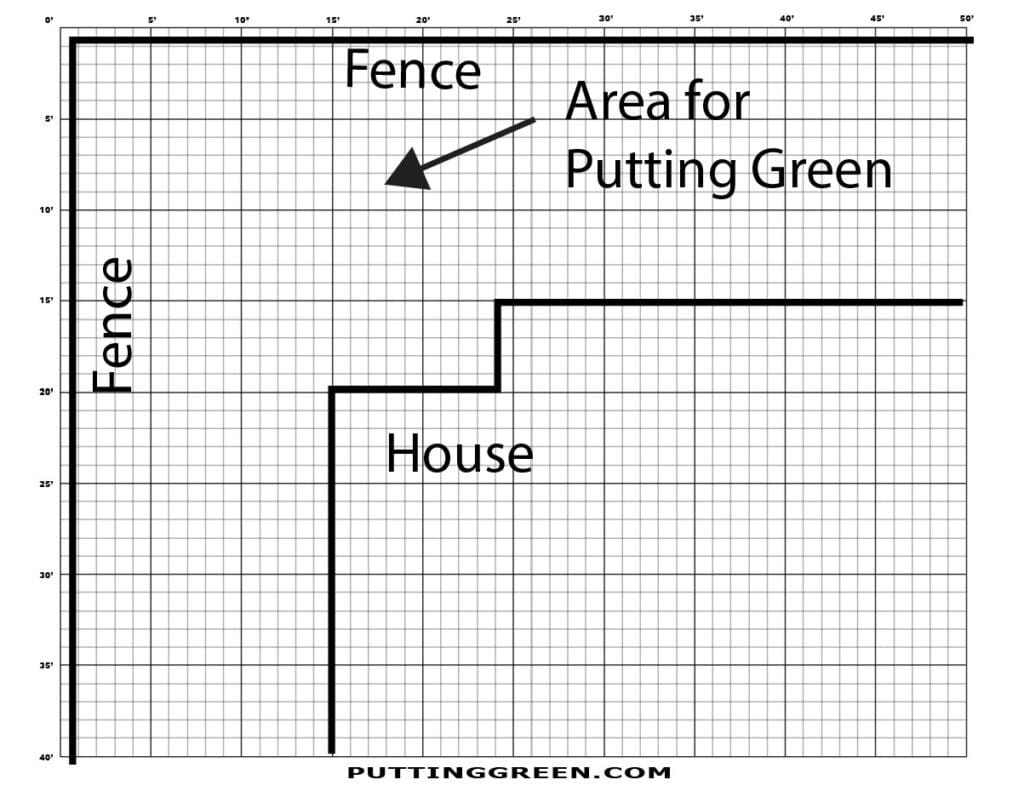
Select a Suitable Site for Your Home Putting Greens
Your synthetic putting greens doesn’t have to take a lot of space, and approximately 1,000 square feet will do. You must ensure that the spot you choose gets enough sunlight and lacks very steep slopes. It is therefore highly advisable to avoid installing your artificial putting green on the side of a hill.
Start Digging
To start preparing you spot, dig up the soil to about 10 inches only. You will be gouging out features resembling “shallow bathtubs,” filling them with sand and eventually covering them with grass to complete your desired look.
Add a Slight Contour on Your Home Putting Greens
The aim of this is to come up with a putting surface to have a slight lilt. However, if the ground lacks natural contours, there is no need to worry. You can add them yourself by using your hands. In particular, you can ensure that you add humps and bumps to your course’s terrain if the site is not rocky. A more practical method is to rent a mini-excavator and craft the surface to your liking. Do not make the site have too exaggerated contours as these may make the course unplayable.
Install a Proper Drainage System to Your Artificial Course
If your artificial golf course lacks a good drainage system for rainy days, you will not enjoy your golfing sessions on your do-it-yourself DIY putting green kits. All you will get is a muddy and soft site that makes putting impossible. Typically, a four-inch perforated drainage pipe is the widely recognized industry standard. There are no set rules of where to put it exactly. You can dig a trench, lay the piping in that trench, then cover the piping with pea gravel. Other people usually add a layer of rock underneath the pipe to ensure that the bottom of the channel is smooth and running downhill consistently.
Cap it with sand
Choose golf course sand that drains well and meets United States Golf Association specifications. Any self-respecting home improvement store should be able to provide you with it.
Seed it or Sod It
You could go either way. Sodding is easier in the short run. But in the long term, seeding will likely give you better-quality turf. What grass variety you plant will depend largely on where you live because different types do better in different climates. Consult with a lawn care expert when making a selection.
Conclusion
With a decent amount of space in their compound, they can save time and money by creating a custom putting green design by installing a do-it-yourself (DIY) putting green kits. To get started with installing your very own custom putting green design, contact us today!
